How to Make Your Own Canvas Pt 1
- macmr8
- Sep 17, 2024
- 2 min read
The best artists don't gatekeep. So, when I figured out how much cheaper it is to make your own canvases, I knew I had to share.
For today's recipe, you'll need four ingredients:
1. Embroidery Hoops- You can buy these in bulk for less than $1 apiece
2. Clothespins- You can get 'em at your local dollar store, or if you're like me, you have about a hundred already laying around your house.
3. Super Glue- I suggest getting the largest bottle possible if you want to make a lot.
4. Canvas by the Yard- You can buy as many yards as you want, the larger the quantity, the cheaper each yard will be. I highly suggest paying a little more now to save a lot later!
Step 1: Cut out Your Canvas

You want your canvas to be about one fingertip bigger than the embroidery hoop, all the way around. This will be important in a later step. Right now, too big is better than too small so if in doubt, go for a whole inch bigger.
Step 2: Stretch the Canvas

Place the outer hoop on a sturdy table, and lay the canvas on top. Then, apply a layer of super glue on the outside of the inner hoop, and smush the inner hoop down. Finally, pull on the edges of the canvas as needed to get it fully stretched out. Leave for 2 hours or until glue is dry.
Step 3: Hide the Edges!


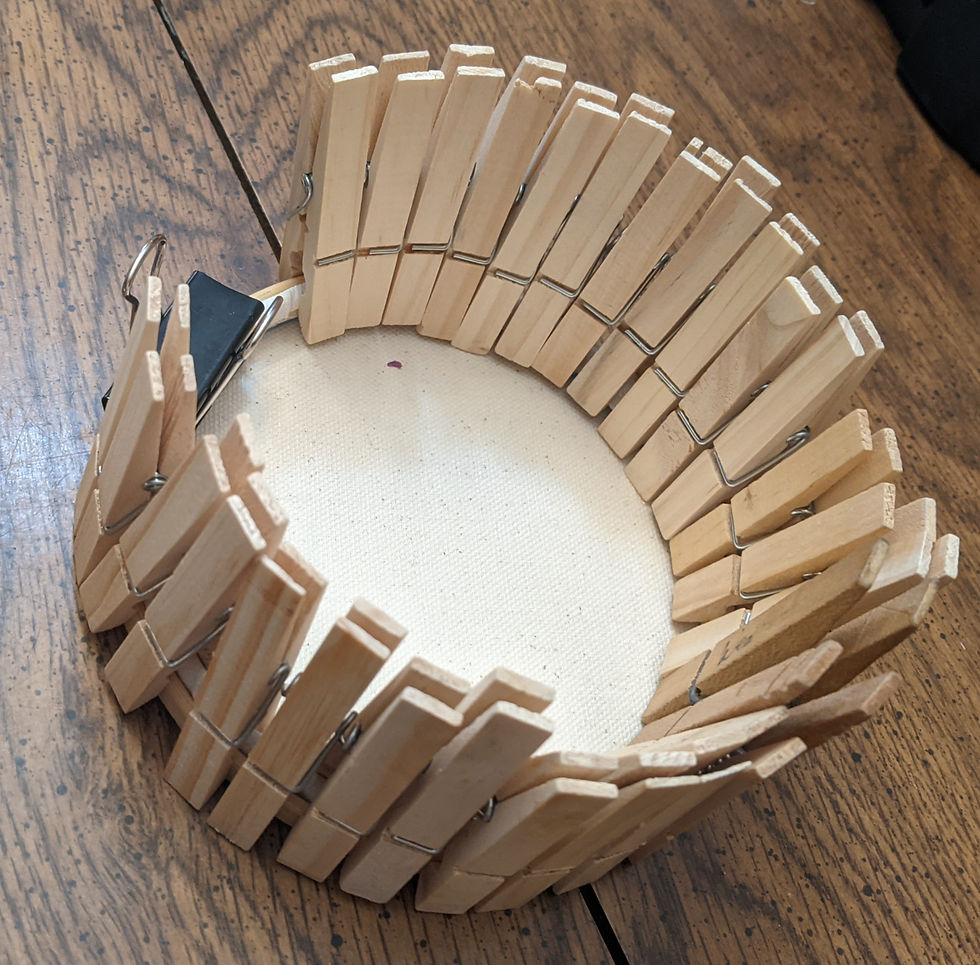
You can now remove the outer hoop. Before you begin, trim the edges if needed. You want them large enough to cover the inner hoop, but small enough that they don't cause an indent on your canvas. Apply a thin layer of super glue to the inside of the inner hoop. Then fold your edges over and secure them with the clothespins.
You should wind up with a crown of clothespins like this:
Pro tip: Always wear gloves when you use super glue. I always forget and regret it when my fingers get all gluey!
Tah Dah! Now you have the perfect stretched canvas!


Comments